Hello everyone!
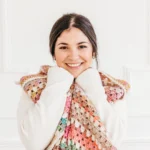
The Riverbed Blanket is back, this time in a beautiful bulky weight version! If you love the texture and simplicity of the original Riverbed Blanket but are looking for something right in between the worsted and super bulky versions, this one is for you.

This post includes affiliate links which help support the content on CJ Design’s blog. My views are entirely my own. For detailed info, please review our Privacy & Disclosures policy here.
This version is made using #5 bulky weight yarn, giving the blanket a soft, cozy feel without being quite as thick and heavy as the #6 super bulky version. It works up faster and feels more substantial than the worsted weight version, while still having a beautiful drape and plenty of stitch definition.
The Riverbed stitch pattern looks just as beautiful in this weight, with its simple texture and modern look. The slightly lighter construction also makes this version incredibly versatile, perfect for curling up on the couch, adding an extra layer to your bed, or making as a cozy handmade gift.
And just like the other Riverbed Blankets, the colour possibilities are endless! You can follow my colour combination, choose a completely different palette, or use the pattern as an opportunity to play with your favourite shades and make your Riverbed Blanket completely your own.
Not ready to crochet yet? Pin this image and crochet later!

Practice your stitches
As I mentioned in previous post, this blanket is categorized as “confident beginner” meaning, you are a beginner, but you know already all of your stitches and feel confident enough to make a blanket that uses a few.
For this pattern, we will be using 2 different stitch combinations, the Block stitch, which we used for the Cloud blanket, and the Granny stitch, which we used for the Primavera Blanket. So if you have made any of these 2 blankets, or know how to make these stitches, you are all set!
Switching colour on every row, or not!
I know you read that right, we will be changing colours in every single row, and I know not everyone likes to be doing this because who likes weaving in ends? No one!
But, on the other hand, sometimes we have to be a little bit more adventurous and play with colour combinations. At the end of the day, this is what will make a project really special, the way you combine different colours and create beautiful palettes.
So hey! I know, it’s not fun weaving in ends, but in the video tutorial below, I will show you the way I like to switch colours and it prevents from weaving in ends.
But one more thing, if you really don’t like changing colours and don’t want to commit to weaving in ends, I have a solution for you. Using variegated yarn can be the trick! This is a very good solution since you don’t have to cut or join a new colour every row, the yarn will do its thing for you.
The best thing, is watching the blanket change colour on its own, not even having to think about it, pretty cool, uh?
Now there is no excuse for you not to make this blanket!

Washing blanket yarn?
I always recommend reading and following the yarn label instructions on how to take care of the projects made with this yarn, but here is how I do it: I usually wash my blanket in the washing machine with my normal detergent in a cold cycle, and because I don’t want my blanket to get ruined, I don’t put anything in there other than my blanket. Then I dry it in the drying machine on a low setting.
And Ta-dah! That’s it, I have never had any problems with it, but please read your yarn labels first!
If you would like the ad-free printable pattern PDF, you can get it from Ravelry, Etsy or My Shop or get the full kit with Lion Brand Yarn here. Complete written instructions with images to follow along.
Check out more crochet patterns


Follow along with the video tutorial on YouTube!
Pst!: This video shows how to make the Super Bulky version, the construction and stitches are all the same, you just have to follow the pattern below to know how many stitches you need.
Stitches you should know
- Chain
- Slip Stitch
- Single Crochet
- Double Crochet
Yarn
Yarn: Bulky Weight #5: I used Lion Brand Cover Story Posh Twist – Chenille type (200g/213m) in the following colours and quantities (to make the size 46″x43″)
Colour F – Lemon Meringue: 144g/153m
Colour A – Kale: 188g/200m
Colour B – Mint Chip: 184g/196m
Colour C – Rosehip: 152g/162m
Colour D – Vanilla Bean: 147g/157m
Colour E – Chocolate Fudge: 158g/168m
Notions
Measurements
Final measurements: 46″x43″ (without border)
If you’d like to modify the size, you will need a chain multiple of 3+2.
Gauge
Pattern stitch starting from the first row 4″x4″: 11 sts x 6 rows. Using a multiple of 3+2 chain and 6.5 mm hook.
Abbreviations
This pattern uses US standard terms
- Ch(s) – Chain(s)
- St(s) – Stitch(es)
- Sc – Single Crochet
- Dc – Double Crochet
- Cl – Cluster (3 Double crochet in the same space)
- [] – Repeat the sequence in the brackets
General Notes
- IMPORTANT: Choose which colour will be your A, B, C, D, E and F before starting.
- The ch 2 at the beginning of each row counts as 1 dc.
- The ch 1 at the beginning of each row does NOT count as 1 sc.
- Only the first double crochet row, worked after the foundation chain, begins with 3 chains, which count as 1 double crochet. All remaining double crochet rows begin with a chain 2 instead.
- We will be cutting the yarn and joining a new colour on each row, feel free to use your preferred method for joining a new colour, or you can follow the technique I showed in the video tutorial.
- To help keep track of your stitch count, all double crochet rows should have the correct number of stitches. The single crochet and chain rows will naturally have fewer stitches.
- Place a stitch marker at the beginning of every row to make sure you are not missing a stitch. (optional)
- This version of the blanket does not have a border. Feel free to add one if you’d like, but please keep in mind that you will need extra yarn to do so.
Pattern
Colour sequence:
[A, B, A, B, C, B, C, D, C, D, E, D, E, F, E, F, A, F, A, B…] Repeat the colour sequence until reaching the desired length or number of rows indicated in the pattern.h or number of rows indicated in the pattern is reached.
Begin with your foundation chain: Chain 113.
Row 1: Dc in the 5th ch from the hook, dc all the way across the chain. Ch 1 and turn. (110 sts in total)
Row 2: Sc in the space between the first and second st, [ch 2, skip 3 sts and sc in the space between sts]. Repeat the sequence across. Ch 2 and turn. (PHOTO A, B, C)
Row 3: [Cl in the ch space from the previous row]. Repeat the sequence across to the last st, dc in the last st. Ch 2 and turn. (110 sts in total) (PHOTO D)
Row 4: Dc in the space between the first and second st, [cl in each space between the cl from the previous row]. Repeat the sequence across to the last space, dc in the space and then dc in the last st. Ch 2 and turn. (110 sts in total) (PHOTO E)
Row 5: [Cl in the space between the cl from the previous row]. Repeat the sequence to the end of the row, then dc in the last st. Ch 2 and turn. (110 sts in total) (PHOTO F)
Row 6: Dc in each st available across the row (not in the spaces). Ch 1 and turn. (110 sts in total) (PHOTO G)
Row 7: Sc in the space between the first and second st, [ch 2, skip 3 sts and sc in the space between sts]. Repeat the sequence across. Ch 2 and turn. (PHOTO A, B, C)
Row 8: [Cl in the ch space from the previous row]. Repeat the sequence across to the last st, dc in the last st. Ch 2 and turn. (110 sts in total) (PHOTO D)
Row 9: Dc in the space between the first and second st, [cl in each space between the cl from the previous row]. Repeat the sequence across to the last space, dc in the space and then dc in the last st. Ch 2 and turn. (110 sts in total) (PHOTO E)
Row 10: [Cl in the space between cl from the previous row]. Repeat the sequence to the end of the row, then dc in the last st. Ch 2 and turn. (110 sts in total) (PHOTO F)
Repeat rows 6-10 until you reach row 76.
Once your blanket is done, fasten off and weave in all your ends.
We will be finishing the blanket on a repeat of row 6.


Diagram


If you liked this pattern/video please give it a like on YouTube and share your pictures online using the hashtag #Riverbedblanket.
If you would like to get the PDF pattern, here’s the LINK. Thank you in advance to all of you who buy the Pattern, this helps me continue sharing free content with all of you!
Happy Crochet ~ Dani